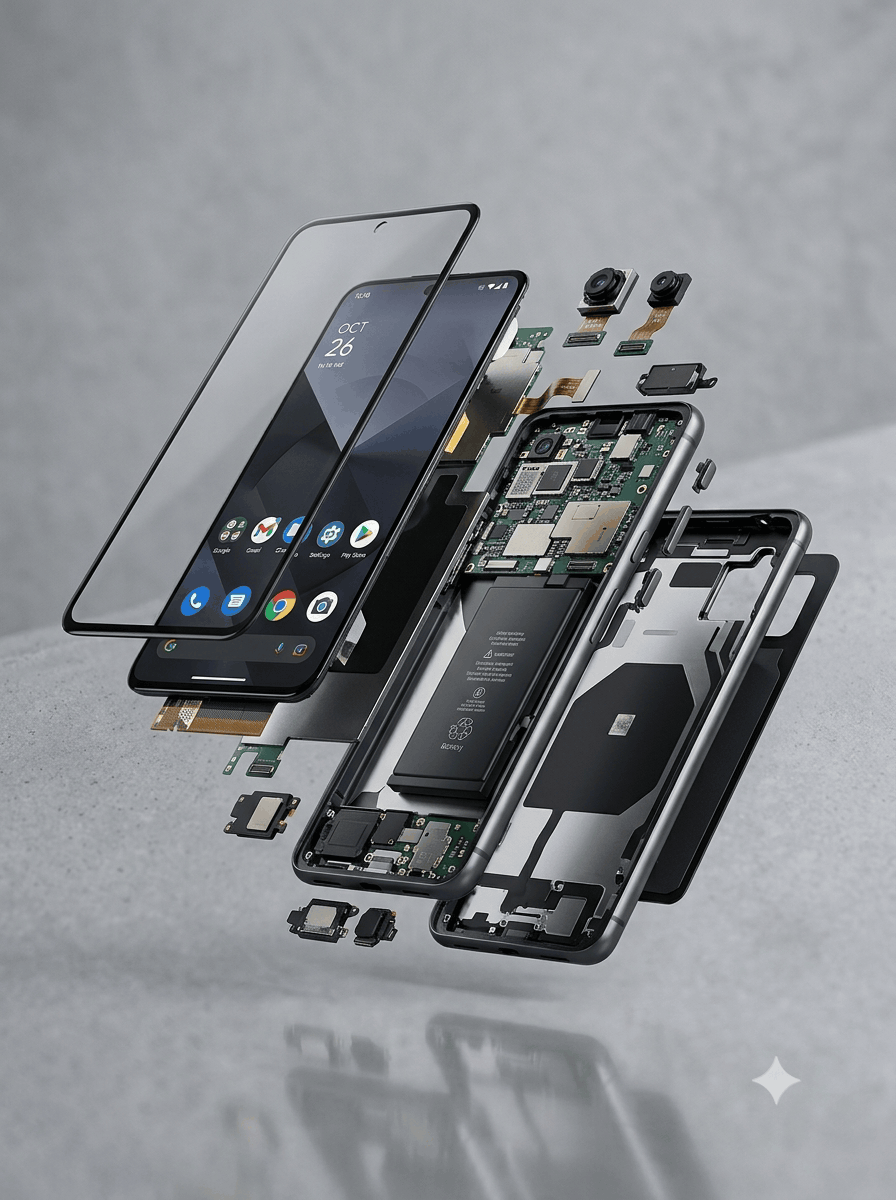
Precision X-Ray Anatomy
Transform any subject into a premium photorealistic X-ray engineering visualization revealing plausible internal structures while preserving exterior identity and branding.
Prompt
# Precision X-Ray Anatomy **Prompt:** Transform the main subject in the reference image into a premium, photorealistic X-ray engineering visualization. Preserve its identity, silhouette, proportions, recognizable design, branding, and distinctive exterior details. **1. Understand the subject** Analyze the object's visible construction, materials, purpose, and plausible internal anatomy before rendering. Reveal components that logically belong inside it: gears and circuits in electronics, cushioning layers in footwear, motors and linkages in machinery, or liquid levels and bubbles in containers. Adapt to the actual subject rather than applying a generic mechanical interior. Never invent elaborate internals merely to make the image look complex. **2. Signature X-ray treatment** Keep the exterior partially intact while selectively revealing its interior through realistic transparency. Combine opaque original materials with translucent glass-like sections and subtle X-ray visibility. Create convincing transitions between solid and transparent surfaces, preserving surface thickness, reflections, refraction, and believable material properties. Make internal structures physically coherent, correctly proportioned, and visibly connected. Layer components at different depths so the viewer can understand how the object is assembled. Preserve enough of the original exterior for immediate recognition. **3. Precision illumination** Use restrained cool-white and icy-blue edge illumination to reveal internal contours, with selective highlights on the most important components. Let materials retain their natural colors and textures. Light should clarify geometry and depth, not turn the object into a glowing hologram. Avoid excessive neon, bloom, and decorative energy effects. **4. Hero composition** Present the subject as a striking premium engineering photograph. Use a three-quarter angle when it best reveals the interior; otherwise preserve the reference's most recognizable viewpoint. Keep the object large, sharply defined, and visually dominant against a deep charcoal or near-black studio background. Add controlled directional lighting, subtle atmospheric depth, realistic contact shadows, and restrained reflections. Use selective transparency to establish a clear visual hierarchy: recognizable exterior first, fascinating internal anatomy second, fine technical details third. Avoid exposing so much that the subject becomes visually confusing. **5. Intelligent technical details** When useful, add a few precise leader lines and minimal component labels. Labels must correspond to clearly visible, confidently identifiable parts. Use clean, understated typography and generous spacing. Omit annotations when accuracy is uncertain or the image looks stronger without them. Never fabricate specifications, measurements, logos, or text. **6. Automatic adaptation** Adjust the treatment to the subject's actual materials and function: - Electronics and watches: crisp components, circuit traces, gears, and precise illumination. - Vehicles and machinery: layered assemblies, structural members, motors, and mechanical connections. - Shoes and equipment: cushioning, support layers, reinforcement, and material cross-sections. - Bottles and liquid products: realistic fluid levels, bubbles, meniscus, transparency, and refraction. - Other objects: reveal only plausible internal structures supported by the reference. These are adaptation guidelines, not elements to combine indiscriminately. Choose only what suits the subject. **7. Realism standard** The final image should resemble a professionally art-directed industrial visualization photographed in a real studio. Maintain coherent geometry, believable assembly, realistic optical behavior, clean edges, detailed materials, natural imperfections, and controlled cinematic contrast. Favor physical plausibility and visual clarity over spectacle. **Avoid:** Cartoon aesthetics, generic sci-fi HUDs, excessive neon, arbitrary floating parts, impossible internal mechanisms, invented components, cluttered labels, fake text, distorted silhouettes, inconsistent reflections, waxy materials, oversaturated colors, excessive glow, artificial-looking surfaces, and generic AI concept-art styling. **Final objective:** Create an instantly recognizable, visually striking product portrait that reveals its hidden construction with precision, depth, and sophistication. Every visual effect must support the subject's real design rather than compete with it.
How to use
1. Open Nano Banana in your browser or API interface. 2. Upload your reference image showing the product or object you want to visualize. 3. Copy this entire prompt and paste it into the text input field. 4. Ensure the model recognizes your reference image as the main subject. 5. Submit and wait for generation — Nano Banana will analyze your subject and apply appropriate X-ray treatment. 6. For best results, use clear product photos with good lighting and minimal background clutter. 7. If the internal anatomy doesn't match your subject's actual construction, refine the prompt by specifying the object type (e.g., 'watch,' 'sneaker,' 'bottle') in the first line. 8. Generate multiple variations to explore different transparency levels and internal detail densities.
- Model
- Nano Banana
- Category
- Ads & Product
- Styles
- CinematicPhotorealistic
More inspiration
Related prompts sharing this model, category, styles or tags.